Removing roof shingles might seem like a straightforward task, but trust me, it’s anything but simple. Sure, tearing off those old, worn-out asphalt shingles can be satisfying with your old garden fork, but the devil is in the details.
From the safety precautions to the nitty-gritty of the shingle removal process, there’s a lot more to it than just a strong back and a sturdy ladder. Properly removing old roof shingles is crucial to ensure the integrity of the new roofing system.
Here at Whalley’s Four Seasons Roofing (W4SR), serving Calgary, we’re here to help you navigate through this complex process through a cautionary DIY guide.
We’ll cover everything from recognizing when you need to replace those shingles to the final clean-up, all while sharing some tips and tricks.
And remember, if at any point you feel in over your head, W4SR is just a call away. After all, sometimes it’s best to let the pros handle it – your back (and roof) will thank you.
Preparing for Roof Tear Off
Preparing is just as important sometimes as the work itself. Now for us, it’s second nature, and we can get started pretty quickly, but if it’s your first time, really make sure you’re ready as
Having roofing underlayment and roofing nails ready before starting the tear-off is crucial to ensure a smooth process.
Signs You Need New Asphalt Shingles
Before you start tearing up your roof, it’s essential to know when it’s time to replace all the shingles (or just a repair). Look out for the telltale signs of aging or damage:
- Curling or Buckling Shingles: If you notice your roof shingles curling or buckling, it’s a clear sign they’re past their prime.
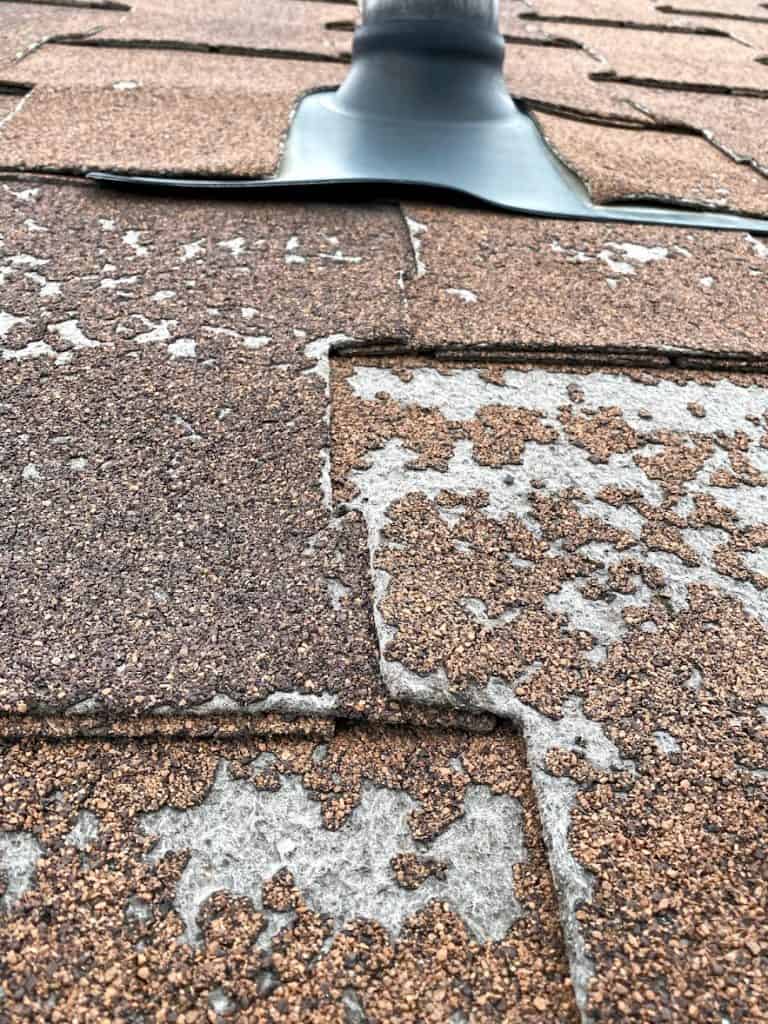
- Missing Shingle Granules: Shingles losing their granules will look like they’re covered in bare spots. This can lead to further damage.
- Damaged or Missing Shingles: Missing shingles can compromise the integrity of your roof, making it vulnerable to leaks.
- Roof Leaks: If you see water stains on your ceiling or notice sagging areas, you’ve got a leak that needs addressing ASAP.
Obtaining Necessary Permits, Tools and Gathering Materials
Check Local Building Codes:
Make sure you’re aware of Calgary’s local regulations. Generally, you don’t need a building permit for roof shingle removal unless you’re making structural changes. For more details, visit the City of Calgary’s permit information.
Gather Your Tools:
Now, if you really wanted to, you could get the job done with whatever you have in your garage.
But as you probably know, nothing beats the right tool for the job (like a broom magnet) and the experience of using that tool constantly.
Unfortunately, we can’t upload that experience for you to download, but we can go over the tools needed.
You can find these tools at specialty stores for roofing and home centers.
Roofing Shovel: This specialized tool comes with a serrated edge to grip and an additional lever for prying.
If you don’t have a roofing shovel, a square narrow shovel can work, as well as a garden fork in a pinch for your roofing tear off.
Hammer: A standard claw hammer is essential for pulling out stubborn nails left behind. While you can use other tools to remove nails, nothing beats the precision and ease of a hammer.
Pry Bar: This flat metal pry bar with a hooked end is essential for prying up shingles and nails during a tear off, especially in tight spots around roof fixtures.
Utility Knife: A sharp, retractable utility knife is handy for cutting shingles, underlayment, or any other material that needs trimming.
Push Broom: A wide broom with stiff bristles is necessary for sweeping away debris and keeping your work area clean and safe. If you don’t have a push broom, any sturdy broom can work, but it might not be as efficient.
Garbage Cans or Dumpster: A sturdy trash container for debris is essential for collecting and hauling away old shingles and other roofing materials.
While you could use heavy-duty garbage bags, a dumpster or garbage cans are much more practical for larger volumes.
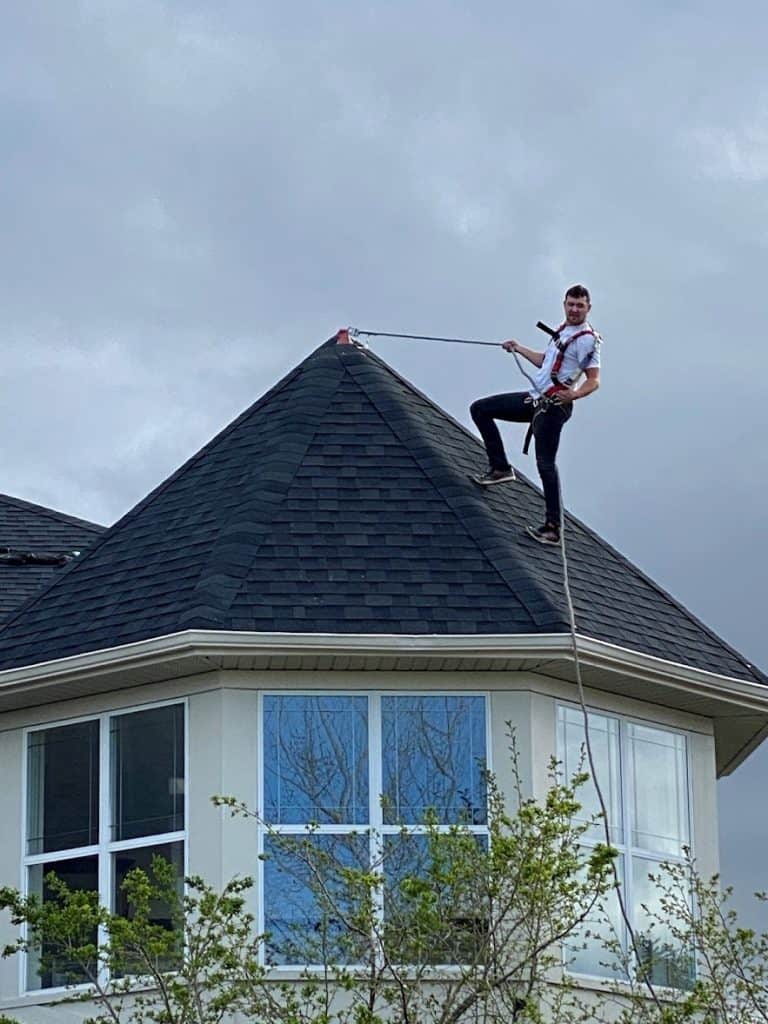
Safety Equipment: Safety is everything when working on a roof. This includes fall protection gear, safety harness systems, and safety glasses. A proper safety harness system, is crucial for steep roofs when you remove shingles.
Safety glasses protect your eyes from debris, while work gloves and long pants provide additional protection. Wearing shoes with soft rubber soles and good grip is crucial for maintaining stability.
If your roof is very high, has awkward spots where you could fall, or you start looking into more professional and expensive safety gear, it’s time to call in the pros.
Don’t take unnecessary risks—professional help can prevent severe injuries and ensure the job is done correctly. Safety equipment is non-negotiable for a safe roofing job, as it’s what a roofing professional will use and finally, don’t forget to wear long pants when you remove shingles.
Roof Jacks: Roof jacks are metal brackets that attach to the roof and hold a plank for standing, providing a stable platform that improves safety and comfort.
Here’s a quick guideline:
- 4:12 to 6:12 Pitch: Generally manageable without roof jacks, but caution is needed.
- 6:12 to 8:12 Pitch: Roof jacks are recommended for added safety.
- 8:12 and Steeper: Roof jacks are essential, along with additional safety measures like harnesses and lanyards.
While not always necessary for shallower pitches, roof jacks are indispensable for steeper roofs.
Ladder: A sturdy, extendable ladder is necessary for safe access to the roof. If you don’t have a ladder, there’s no substitute—it’s a must-have for any roofing project.
Tarp: Large, durable tarps are useful for protecting landscaping and collecting debris. While not absolutely necessary, they are a nice-to-have item that can save you a lot of cleanup time and protect your property.
Roofing Underlayment and Roofing Nails: Before starting the tear-off, make sure you have roofing underlayment and roofing nails ready. These materials are crucial for the subsequent steps in your roofing project.
Consider What You’ll Need After the Tear-Off
Remember, this guide covers only the shingle removal process.
Installing a new roof involves additional steps and materials, such as new gutter flashing, a water barrier, felt paper, ice, chalk line and water barrier (crucial for us in Calgary) and don’t forget the new shingles after the tear off. It’s also important to have roofing underlayment and roofing nails ready for the installation of new shingles.
Proper installation is key to a durable and weather-resistant roof.
Also, looking out for damage throughout the process, knowing how to handle areas around plumbing vents the ridge caps, proper installation of ice and water barrier before new asphalt shingles, proper disposal of the trash container and even an air conditioner on your roof.
With all of this in mind, if you’re unsure or need assistance, don’t hesitate to reach out to the professionals at W4SR. We’re here to ensure your tear off is completed safely and effectively.
Roofing tear off Process
Now before we start, something to keep in mind is layered shingles when there is more than one layer, the steps compound and require a lot more work. You can read about layered shingles here. You will also find that ice and water barrier or lack of one has damaged the roof deck, requiring you to remove and then place plywood to fix.
Additionally, ensure you have roofing underlayment and roofing nails ready before starting the tear-off.
Now with those potential problems out of the way, here are the steps.
Start Tearing Off Roof Shingles from the Peak
- Prepare: Gather all your tools and equipment. Use tarps to protect windows and cover areas around where you will be disposing of the shingles. Make sure you have roofing underlayment and roofing nails ready before starting the tear-off.
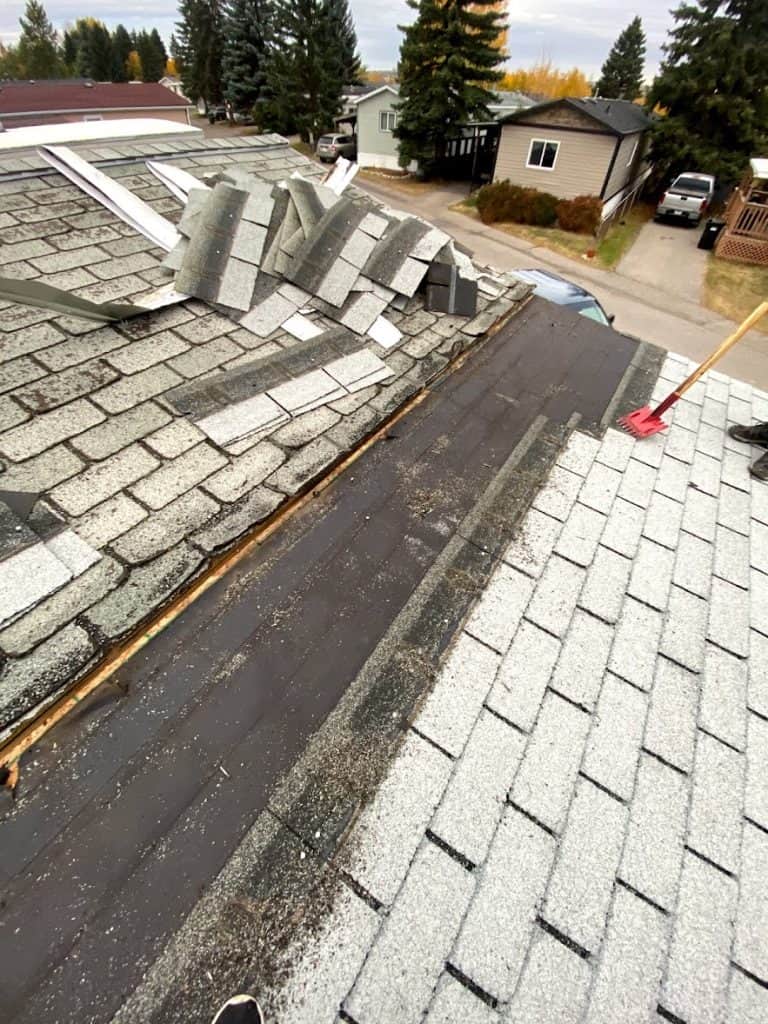
- Start at the Top Peak: Begin the roof tear at the highest point of your roof. Using a roofing tear-off shovel, carefully pry up the ridge caps to help you remove shingles. Now, to be honest, you can start anywhere, as we will sometimes start with different sections first, but most of the time top down.
- Lift the Shingles: Work your way down the roof, lifting all the shingles. Be careful not to damage the roof decking beneath.
- Use a Roofing Fork or Pry Bars: These tools will help you efficiently tear off the shingles, especially those stubborn ones.
Evaluate and Remove Flashing
- Inspect the Flashing: Check the thin pieces of material that direct water away from the roof for any signs of wear or damage.
- Remove Valley Flashing and Step Flashing: These need to be removed before you can install new shingles.
- Replace Damaged Flashing: If the flashing is rusted or cracked, replace it to ensure your new roof is watertight.
Remove Shingles Along the Edge and Clean the Roof
- Work from Top to Bottom: Remove shingles along the edge of the roof, moving methodically from top to bottom. Before starting the tear-off, ensure you have roofing underlayment and roofing nails ready for the next steps.
- Clean the Roof Deck: Remove all protruding nails and any remaining debris to leave a smooth surface.
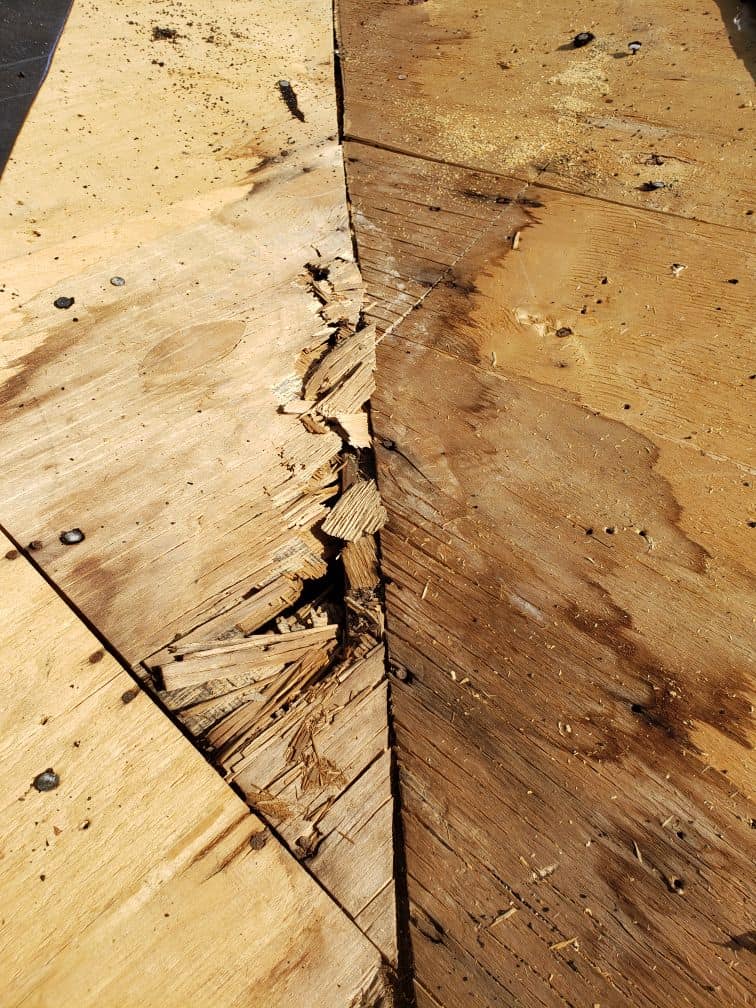
- Inspect the Roof Deck: Look for any signs of damage or rotten roof sheathing. It’s crucial to address these issues before proceeding.

Inspect and Prepare the Roof Deck
Now we are only covering the
- Inspect the Roof Deck: Check thoroughly for damaged or rotten sheathing. Before starting the tear-off, ensure you have roofing underlayment and roofing nails ready for the installation process.
- Replace Damaged Sheathing: Any compromised areas should be replaced to ensure the stability of the new roof.
Clean Up Nails and Other Debris From Yard
- Use a Broom Magnet: This tool helps collect all nails and metal debris from your yard.
- Dispose of Old Shingles: Use the rented dumpster to dispose of all old shingles and roofing debris responsibly.
Common Issues and Complications
Pitch of the Roof
The pitch of your roof plays a significant role in the difficulty and safety of the process. Steeper roofs require extra caution and additional safety measures.
Multiple Layers of Shingles
- Identifying Extra Layers: Older homes often have multiple layers of shingles, which can add significant weight and complexity to the removal process.
- Extra Labour: Removing multiple layers requires more effort and time. Each layer needs to be removed carefully to avoid damaging the roof deck.
- Potential Hidden Damage: More layers can hide issues such as water damage or rot, which need to be addressed before new roof shingles can be installed.
Dealing with Protruding Nails and Stray Nails
Protruding or stray Nails can be a hazard during the roofing tear off, ensure all nails are either removed or hammered flat. Collect all loose nails to prevent injuries and ensure a clean work area.
Pros and Cons of DIY
Pros of DIY
- Cost Savings: Doing it yourself can save money on labour costs.
- Learning Experience: You gain valuable knowledge and skills.
Cons of DIY
- Physical Strain: Removing shingles is hard work and can take a toll on your body, especially if you’re not accustomed to such labour.
- Safety Risks: Working at heights and handling heavy materials pose significant safety risks.
- Potential for Mistakes: Without proper experience, mistakes can lead to costly repairs or rework.
- Right Tools and Materials: Ensuring you have the correct tools and high-quality materials is essential.
- In over your head: once you start the process, you find damage or something else that needs to be fixed. And with your roof torn off, you now need to fix it quickly. So the tear off can lead to more work, and you can become overwhelmed.
Why Professional Roof Shingle Removal is Recommended
- Expertise and Efficiency: Professionals handle roofing tear-offs efficiently and safely.
- Safety Measures: Pros use advanced safety equipment and techniques.
- Quality Assurance: Ensuring a quality job that stands the test of time.
- Addressing Unseen Issues: Professionals can spot and fix issues like water damage or soft areas.
- Convenience: Hiring the same roofers for removal and installation streamlines the process and ensures consistency.
Want Your Roof Removal and Replacement Done Properly?
Roof tear off is no small task. It’s labour-intensive, time-consuming, and fraught with potential hazards.
While the DIY route might save you some money upfront, the risks and physical toll can outweigh the benefits.
Hiring professionals like W4SR ensures a safe, efficient, and high-quality job. So, if you’re in Calgary and need a new roof, let us handle the shingle removal (tear off) for all the shingles including the proper installation (including ice and water barrier) of new shingles.
Contact W4SR for a free estimate and let’s get your roof back in top shape!